随着项目业务越来越多,引入的包就越来越多,发现项目的打包时间太长了,需要优化一下。网上搜到的那行方法,基本上在项目中都做了。项目是react, 用的antd,也使用了按需引入。后来看到一个autodll-webpack-plugin的插件,觉得很有效。是结合了之前的DLLPlugin和DLLReferencePlugin实现自动整合,插入html,非常方便。话不多说,开始搞起。
autodll-webpack-plugin 的作用是什么?
在webpack打包时,对于第三方依赖的库,比如Vue,vuex,vue-router,react,react-dom等这些不会更改的依赖。webpack 也都会默认的进行打包,然后加到html中。这个是比较浪费的,因为我们只需要对更改的文件进行打包,未更改的依赖直接加到html上就好。 autodll-webpack-plugin的作用就是让依赖代码和常常修改的代码分开打包,每次更改我的代码后,webpack只需要打包我更改的代码,对于第三方依赖,只在第一次打包的时候打包一次,以后都不会再打包,这样来减少打包时长。 其实最早用此方法的是DLLPlugin 和 DLLReferencePlugin。只不过这俩用起来不太自动化,需要一些手动配置。所以我就想一步到位,使用autodll-webpack-plugin 自动整合。
autodll-webpack-plugin的使用
webpack 4下,执行:1
npm install --save autodll-webpack-plugin
webpack 2 / 3下,执行:1
npm install --save autodll-webpack-plugin
接着在你的webpack.config.prod.js中引入如下代码:
(怎样在react中找到wepback的配置文件,自行搜索)1
2
3
4
5
6
7
8
9
10
11
12
13
14
15
16
17
18
19
20
21
22const AutoDllPlugin = require('autodll-webpack-plugin');
plugins: [
new HtmlWebpackPlugin({
inject: true, // will inject the main bundle to index.html
template: './src/index.html',
}),
new AutoDllPlugin({
inject: true, // 将会自动注入dll到index.html
debug: true, // 会在控制台看到执行
filename: '[name]_[hash].js',
path: './dll', // 编译出来的存放目录。
entry: {
vendor: [ // 这里面写你不需要多次打包的依赖库
'react',
'react-dom',
'lodash'
]
}
})
]
注意: 如果你不想手动把第三方依赖的库加入html的话,配合html-webpack-plugin一起使用,可以自动将js加入html.我就是采用的这个方法。可是坑也就是在这里埋下的。
坑来了,猝不及防
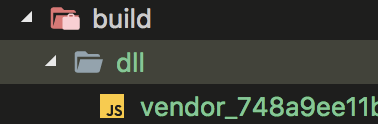
准备就绪之后,我开始执行npm run build。build命令执行之后,可以看到我的编译时间可以说是缩小了一半,太厉害了!build文件夹下也有dll文件夹,里面是我打包进去的vendor.xxx.js。
但是我打开index.html查看,却没有发现有script标签的源文件是dll/vendor.xxx.js的。我刚开始以为是路径写的不对,开始修改路径。可是越改越乱。无论我怎么改就是不行。
找原因。
既然是往html中注入,那就肯定和html-webpack-plugin有关。一步一步来。我先按照github上给的demo,在本地运行一下,看看这个功能是否可行。
执行完这个例子,确实是可以的。那为什么我的项目就不可以?
来看看例子上的html-webpack-plugin版本号

再看我项目上用的html-webpack-plugin版本号

两个版本对不上。
运行autodll-webpack-plugin给出打demo,在src/plugins里面进行信息打印,是有输出的。
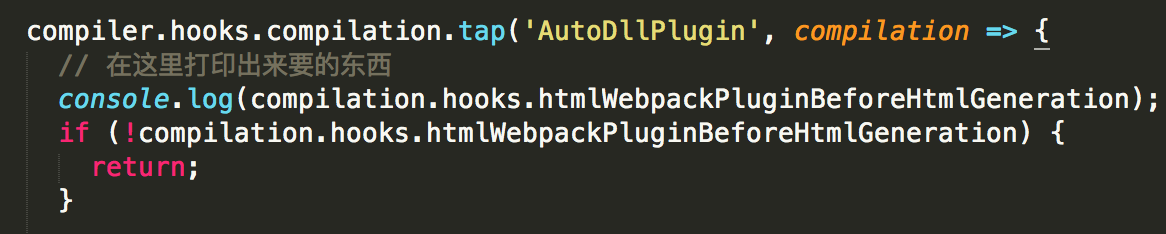
但是在我的项目中这个地方出来的却是undefined。原因找到了,html-webpack-plugin3.0版本用api的是htmlWebpackPluginBeforeHtmlGeneration,但是在4.0.0版本里面缺没有找到这个api。
解决方法:
在html-webpack-plugin 4.0.0版本里找到了与此htmlWebpackPluginBeforeHtmlGeneration相同的apibeforeAssetTagGeneration。于是就开始更改autodll-webpack-plugin中的lib/plugins.js文件。
具体更改如下:
要先引入 4.0.0的html-webpack-plugin1
var HtmlWebpackPlugin = require('../../react-scripts/node_modules/html-webpack-plugin');
然后更换新的api1
2
3
4
5
6
7compiler.hooks.compilation.tap('AutoDllPlugin', function (compilation) {
if (!HtmlWebpackPlugin.getHooks(compilation).beforeAssetTagGeneration) {
return;
}
HtmlWebpackPlugin.getHooks(compilation).beforeAssetTagGeneration.tapAsync('AutoDllPlugin', doCompilation);
});
然后执行 yarn build
可以看到,已经自动加到index.html中了。完成!